CyberPanel (founded in 2017) redefines hosting management with its user-friendly interface and powerful features. Leveraging LiteSpeed Web Server, it ensures unmatched speed and resource optimization. Offering one-click installations, advanced security, and support for multi-domain management, CyberPanel caters to diverse hosting needs. What sets it apart is its affordability without compromising on functionality. Whether you're a beginner or a seasoned developer, CyberPanel provides a streamlined solution for efficient and cost-effective hosting management.
- Step 1: Generating a CSR and Private Key
- Step 2: Order and Configure the SSL Certificate
- Step 3: Upload the SSL Certificate Files to your Server
- Step 4: Test the SSL Certificate
Step 1. Generating a CSR and Private Key
What is a CSR?
A CSR, or Certificate Signing Request, is an encoded text generated by a web server during the SSL certificate application process. It includes information about the entity requesting the certificate, such as the public key, common name, organization, and other details. The CSR is sent to a Certificate Authority (CA), which uses it to create the SSL certificate, facilitating secure communication between the web server and users' browsers.
Navigate to SSLTrust's CSR Generator and generate your CSR and Private Key.
Make sure to save the generated Private Key and CSR in a secure location. This can be particularly useful if you want to re-do the SSL
Certificate configuration.
Step 2. Order and Configure the SSL Certificate
The subsequent step in the installation process is to order and configure SSL Certificate. We recommend SSLTrust because of our exceptional Customer Service, Money Back guarantee and SSL Installation Service. Here is a bit of information about SSL Certificates to help choose the best for you and your website.
Level 1: Standard SSL certificates
Standard SSL certificates deliver essential security by validating domain ownership, offering a cost-effective solution with the padlock symbol and "https://" protocol. While not as comprehensive as higher-level certificates, they provide reliable online protection at an affordable price.
If you have a single website, you can now secure that from a variety of cheap, easy and fast to implement SSL Certificates.
Level 2: Business SSL Certificates (OV)
Organization Validation (OV) SSL SSL certificates provide advanced security by rigorously validating domain ownership and business legitimacy, instilling confidence in online visitors. The padlock symbol and "https://" protocol visibly communicate a secure online presence, effectively addressing trust and data protection concerns.
If you have a business website and want to instill higher trust and authenticity among your customers then go for one from many Business SSL (OV)Certificates.
Level 3: Business Premium SSL Certificates (EV)
Extended Validation (EV) SSL certificates ensure top-tier online security by rigorously verifying domain ownership and organizational identity. With a distinctive green address bar, padlock symbol, and "https://" protocol, they offer the utmost assurance to users, making them essential for businesses prioritizing trust and data integrity online.
If you have an online enterprise website and want to display the highest level of trust and authentication then choose from Business Premium (EV) SSL Certificates.
If you're still unsure of what certificate to pick, do not hesitate to contact our Sales Team and they will be glad to help you out.
1: Once you've added the SSL Certificate into your cart, you can now click on Checkout to complete the process.

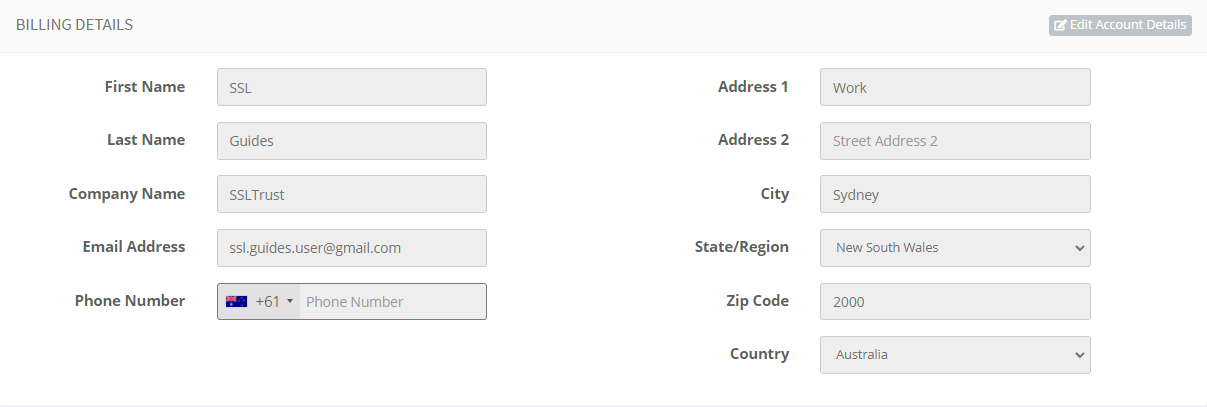
Fill in your account details
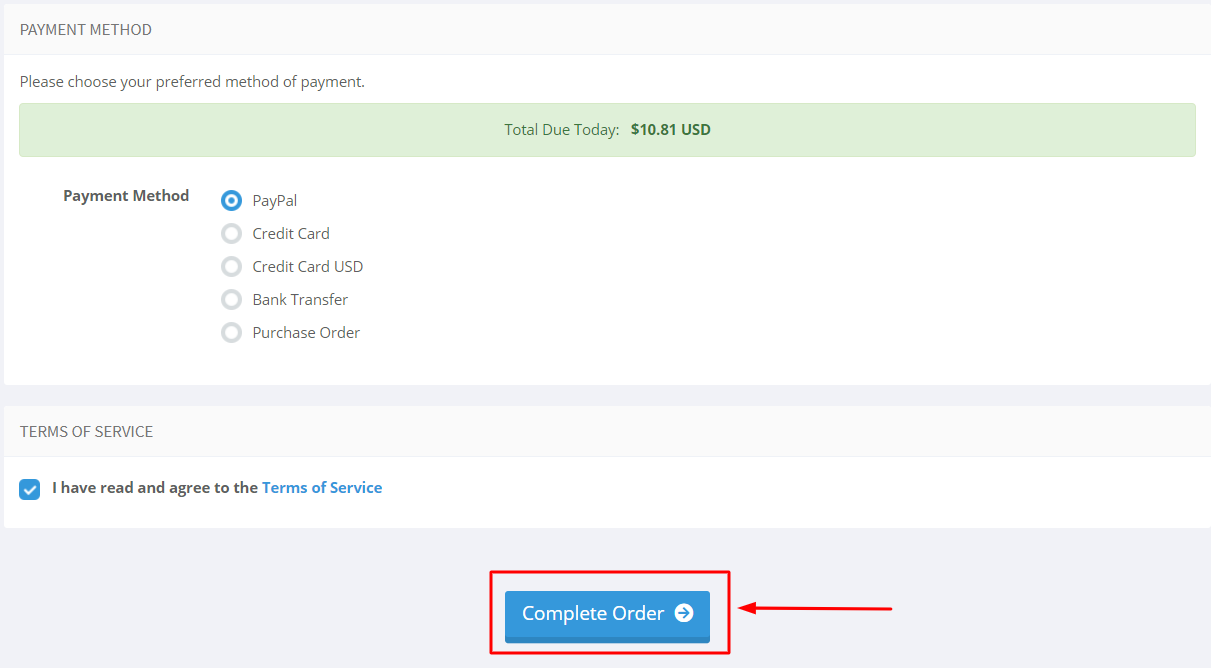
Choose your preferred mode of payment and click on checkout.
2: After you have purchased the SSL Certificate, you can start the configuration process.
This can be started by going into your SSLTrust account and managing your recent purchase.
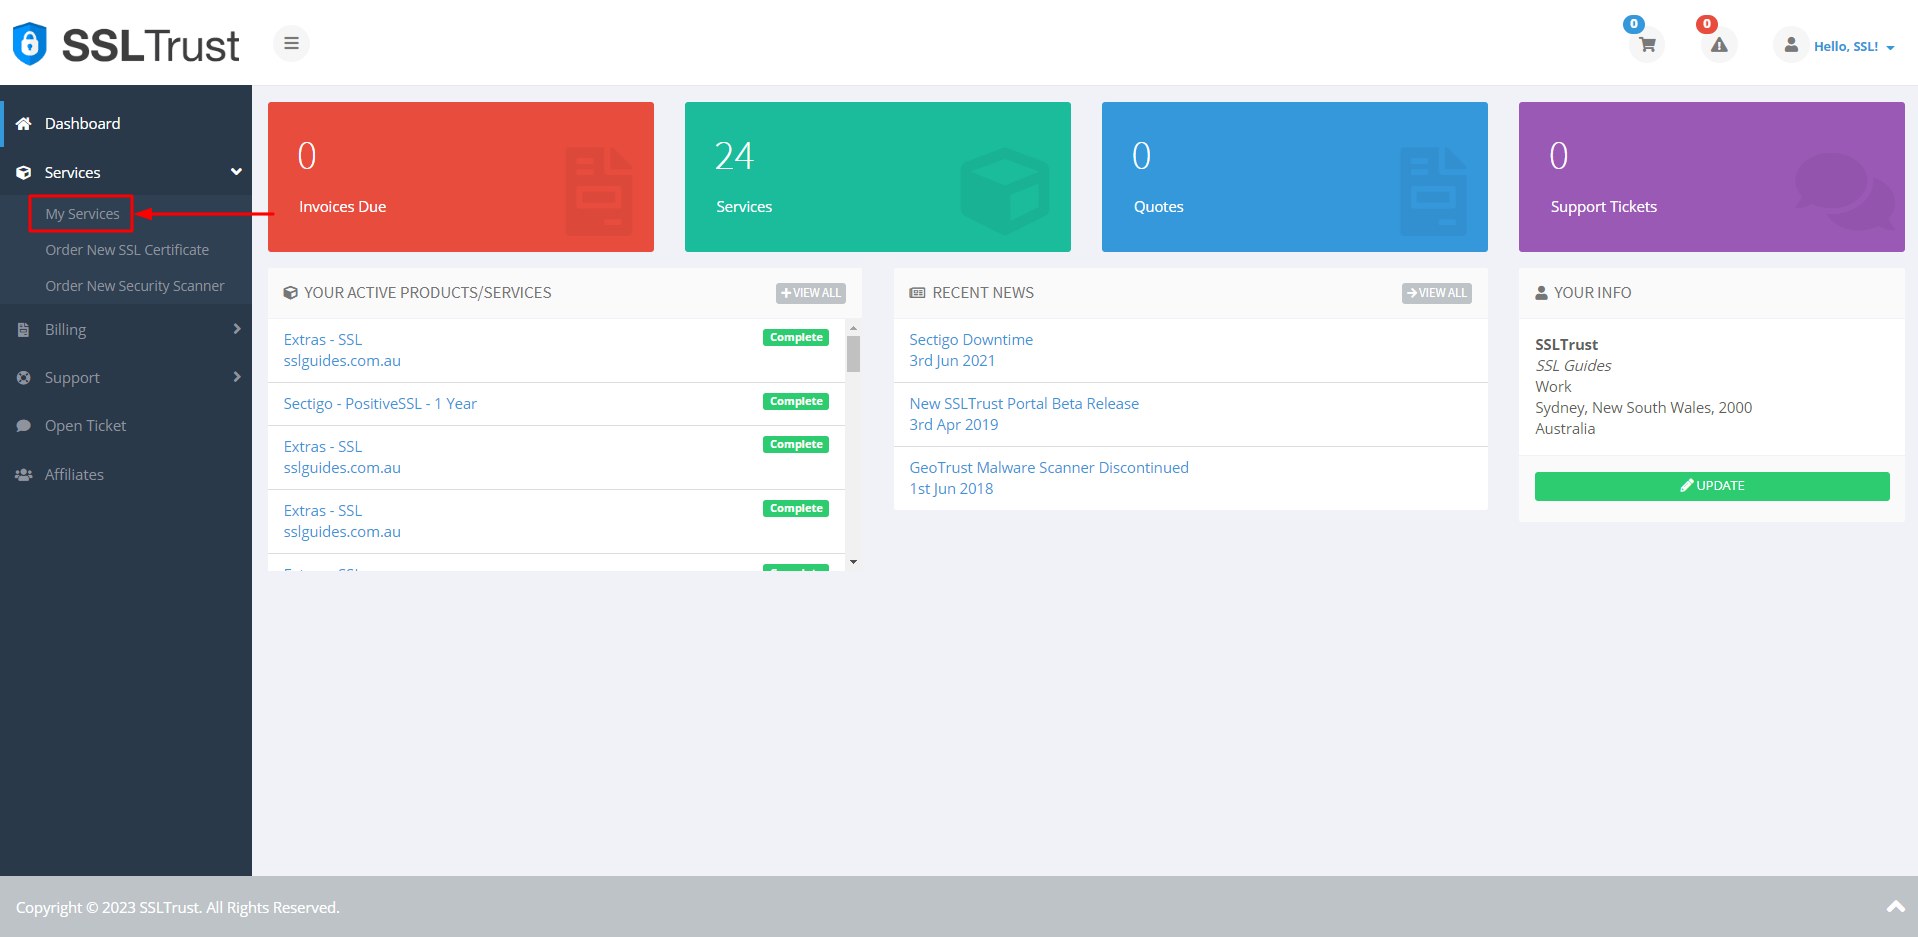
Head over to the SSLTrust Dashboard and under Services, select My Services.
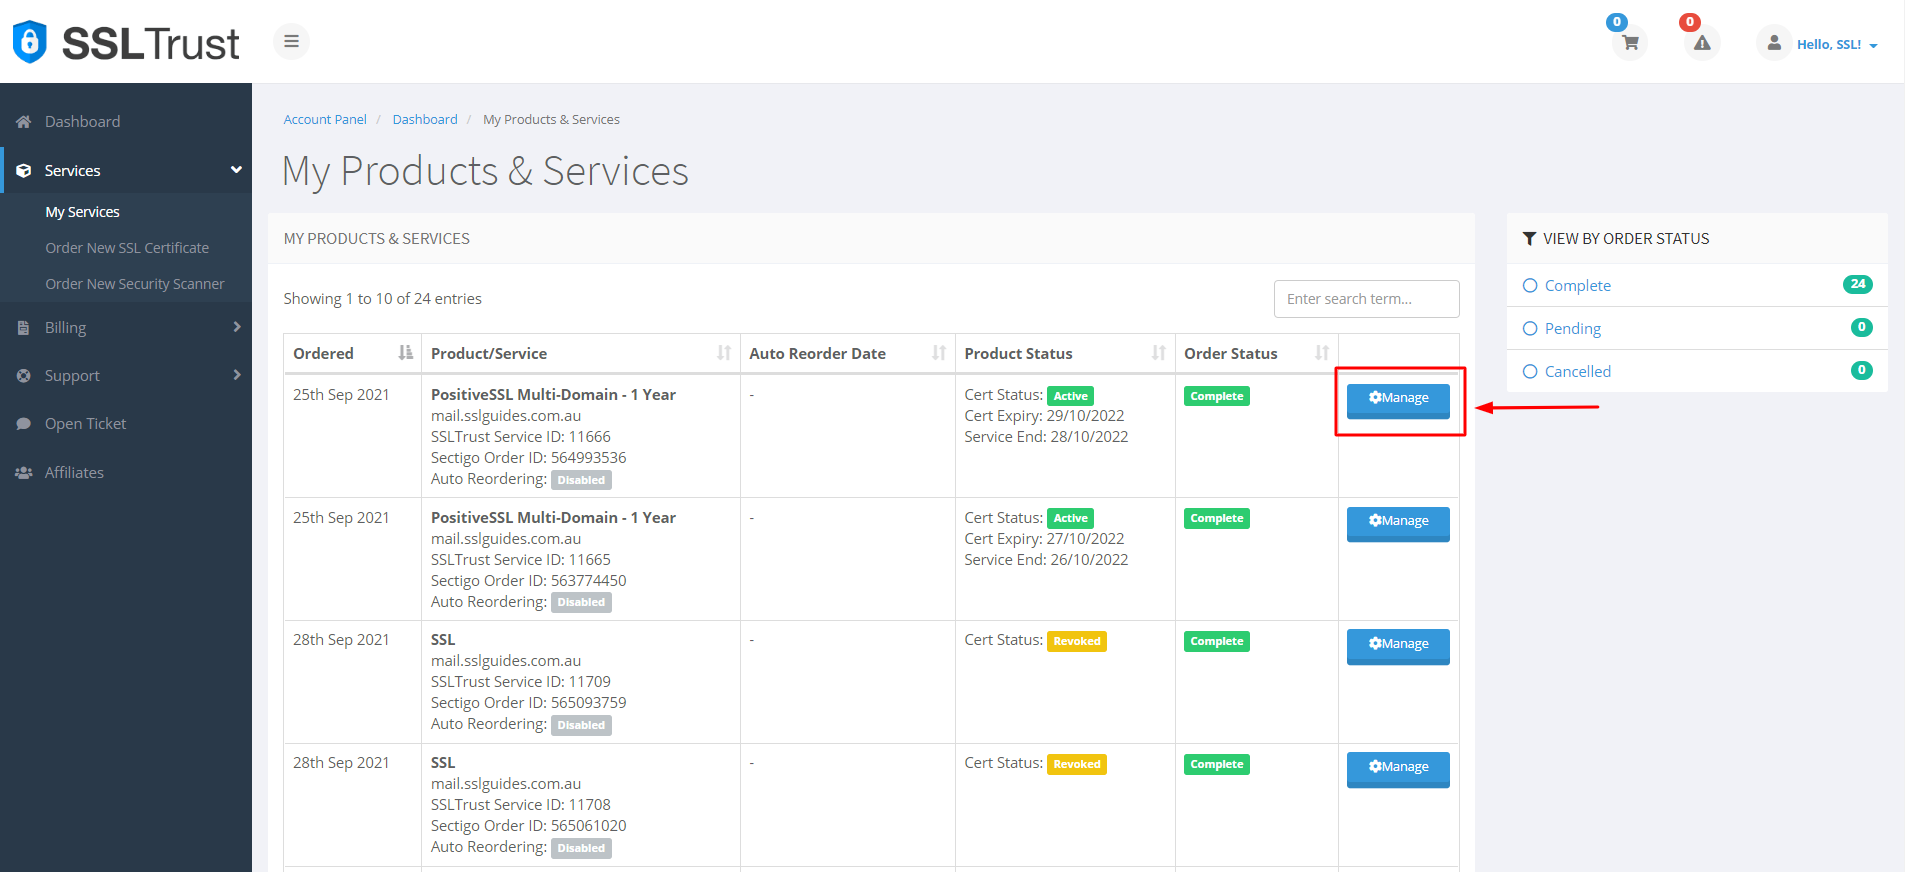
You should be able to see your purchased certificate and order status, now click on Manage
This will take you to the Product Details of your SSL Certificate. Click on start configuration to do the configuration yourself or you can provide the URL below to the appropriate person to complete the configuration for you.

3: Copy and paste the previously generated CSR (Certificate Signing Request) which should include:-
  -----BEGIN CERTIFICATE REQUEST-----
  -----END CERTIFICATE REQUEST-----
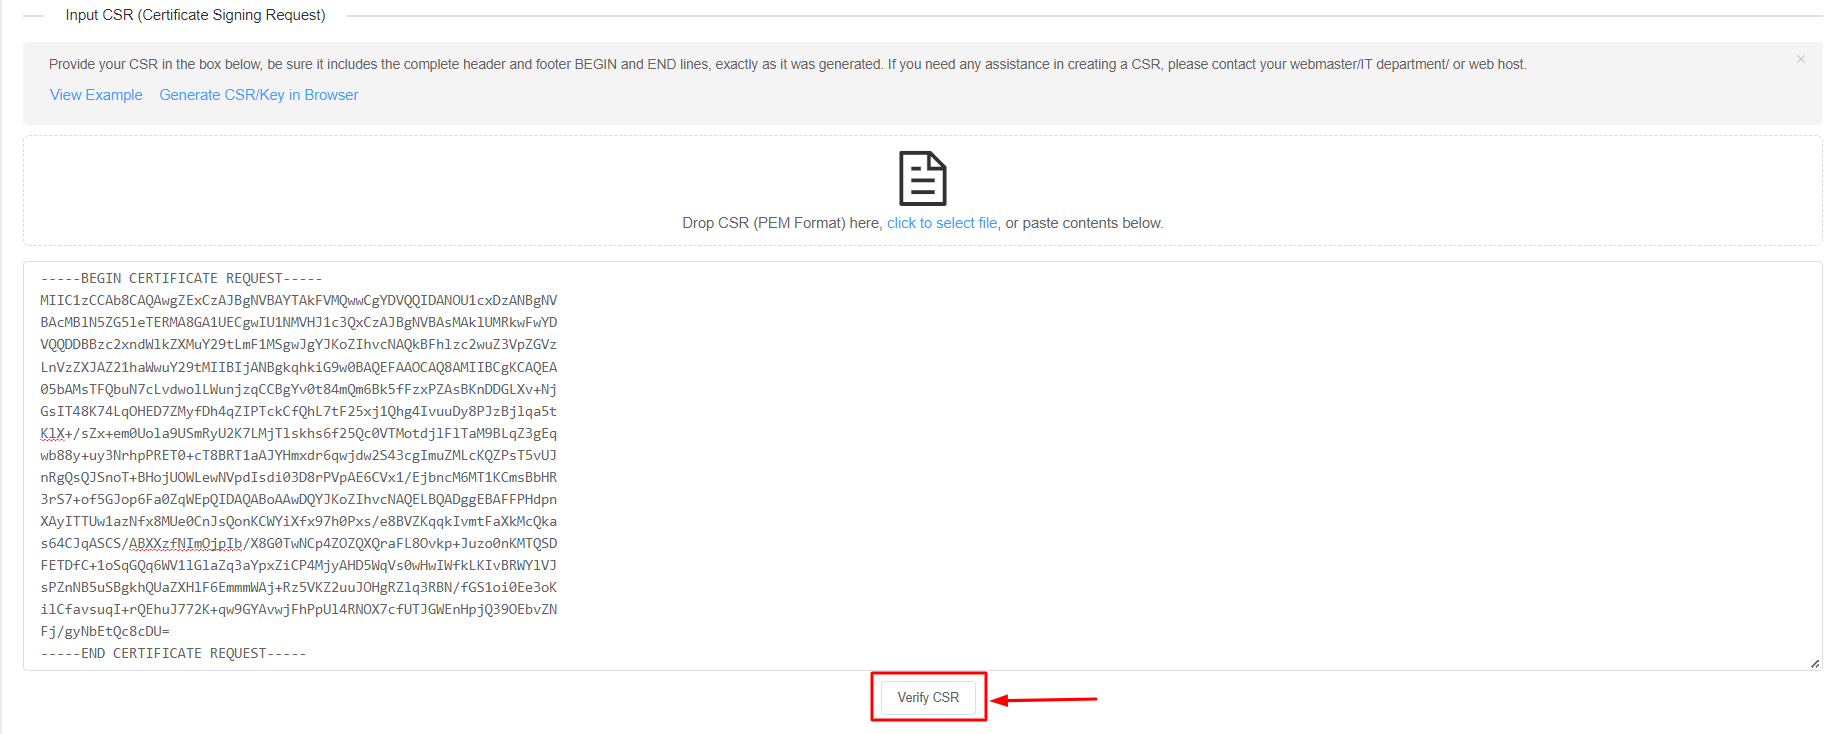
Then, click on Verify CSR.
If the CSR details match the inputs you've entered before, you can now proceed or else generate a new CSR with proper details.

Select the Server Type and click on Next Step>

4: Fill in your contact information
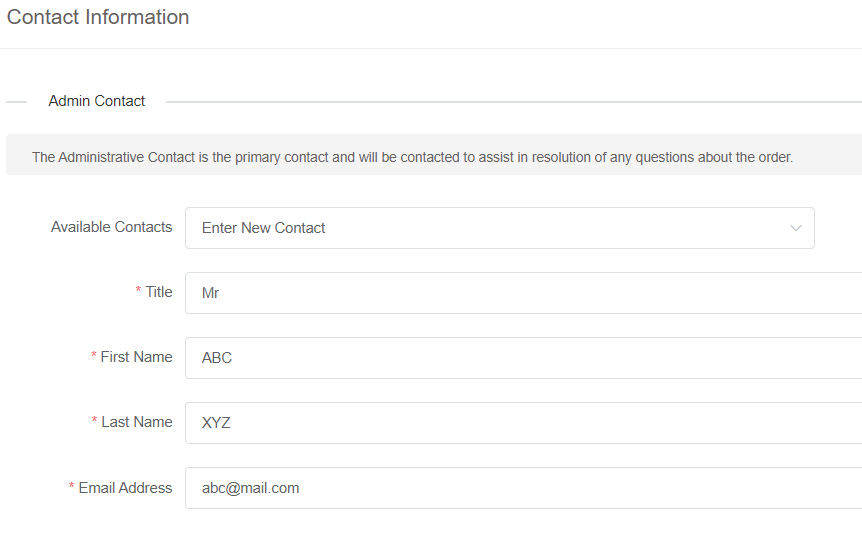
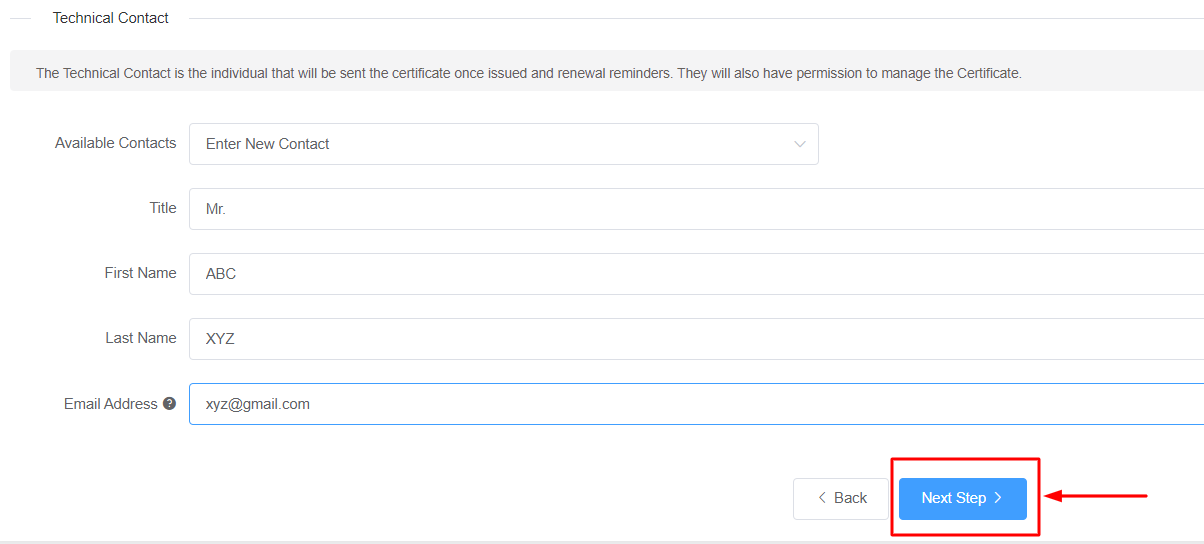
If you have a technical contact managing the certificate for you, please enter their details.
They will also have permission to manage the Certificate and will be sent renewal reminders.
To obtain a business SSL certificate, you will need to provide your business details, including your correct address, phone number, and legal entity name. The Certificate Authority will verify the accuracy of this information. If there are any mistakes, it may cause delays in the process.
Then, click on Next Step
5: The next step in this process is Domain Control Validation (DCV).
DCV, or Domain Control Validation, is a crucial step in SSL certificate issuance. It verifies that the entity requesting the certificate has control over the specific domain by utilizing methods like email verification, file uploads, or DNS changes. This process ensures the legitimacy of SSL certificates and enhances online security.
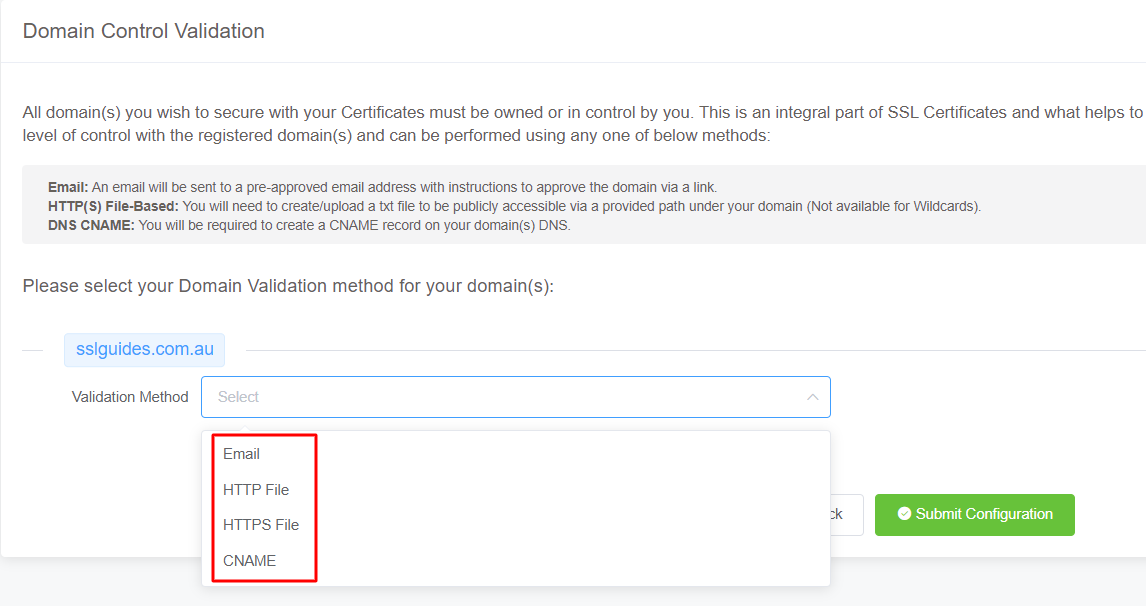
Select the method that is easiest for you. Having an email address with the domain name will be the quickest.
You will be sent an email containing a link which when clicked upon should validate your domain name.
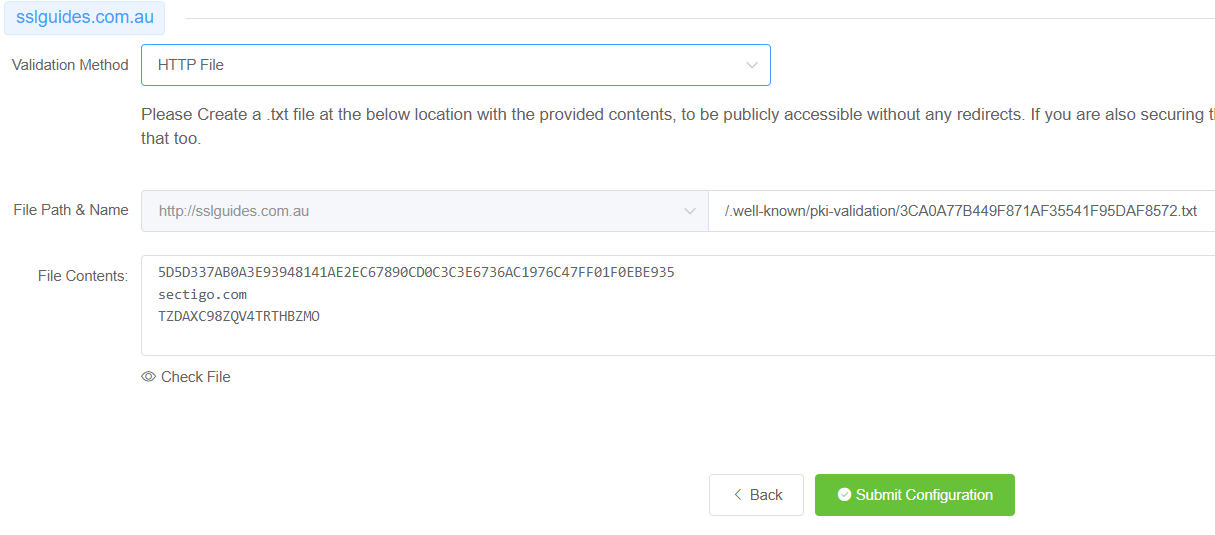
In HTTP/HTTPS File Validation Method, you can create a folder in the specified and directory, paste in the contents and your domain should be validated.
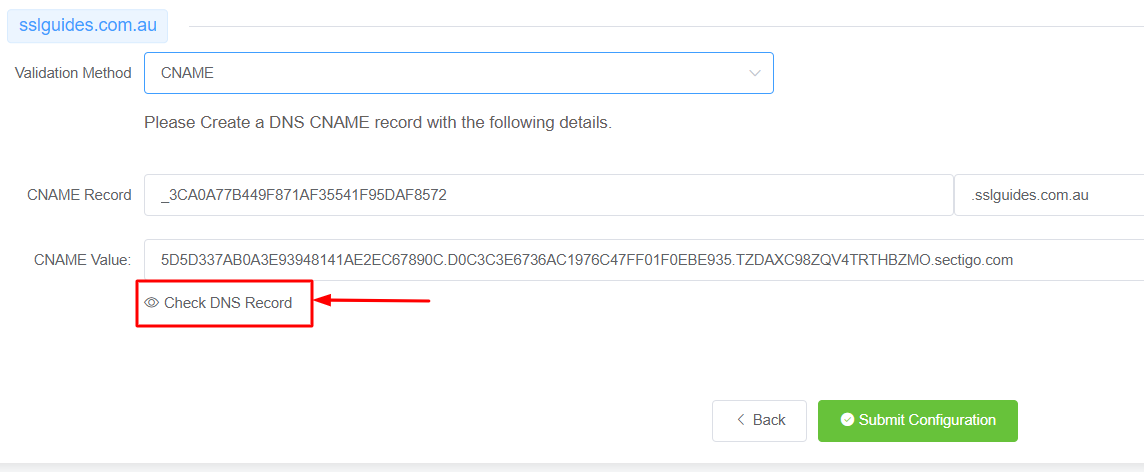
The final method to validate your domain name would be CNAME Validation. Basically you have to create a CNAME record in your DNS Settings to validate your domain name and then click on the Check DNS Record button to verify DNS changes.
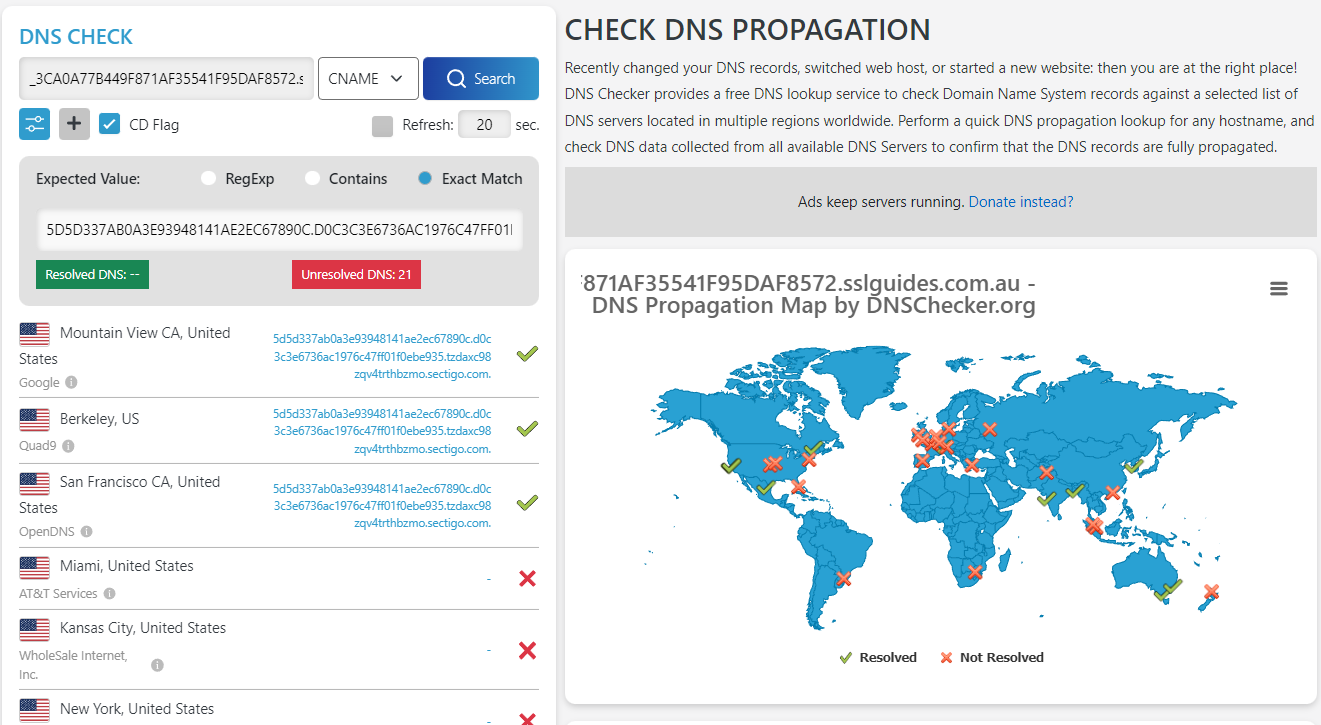
After a few seconds or minutes depending on your DNS propagation speed, the CNAME record should be verified.
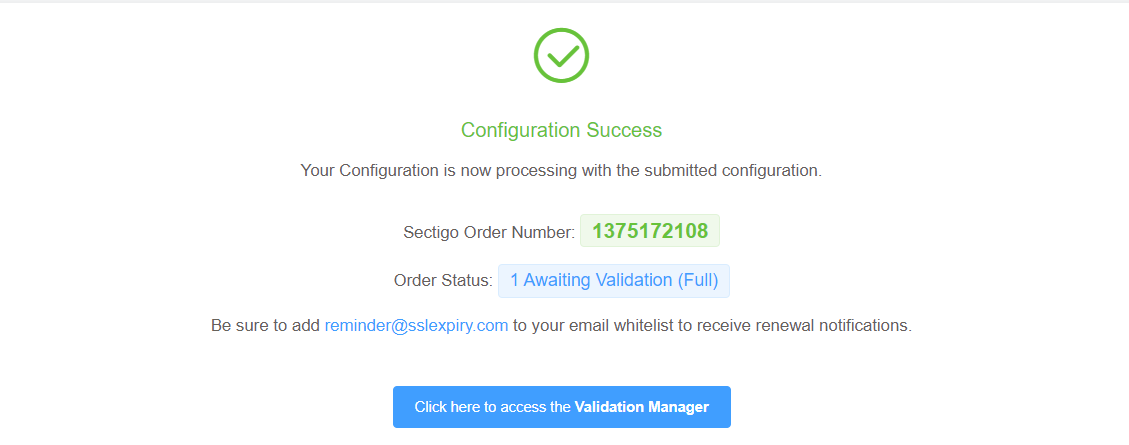
The configuration should be a success. Click on the button below to access the validation manager.
6: Your certificate should have now been issued if you completed all the above steps correctly.
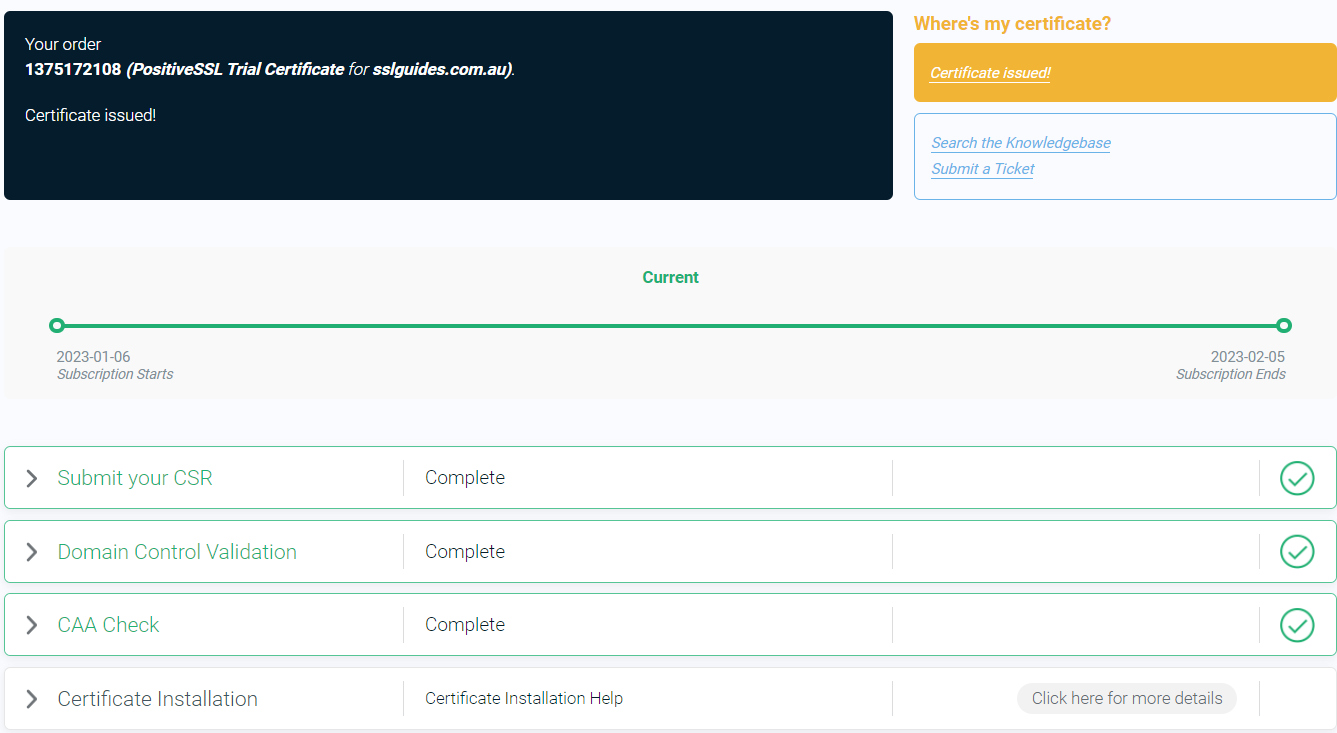
If not, click on Domain Control Validation, and re-submit whatever method you chose for validation.
Upon completing domain validation using the chosen method, your SSL certificate will be issued. If you have ordered a Business SSL, you will need to wait for the Certificate Authority to verify your business address and phone number. If the validation process has not been completed or you have not received your certificate after a certain period of time, please reach out to the support team to check on the status of your certificate.
Step 3. Upload the SSL Certificate Files to your Server
Once your SSL certificate has been issued, you will receive an email with the certificate directly from the Certificate Authority. Alternatively, you can download the certificate from the SSLTrust Portal, which presents the certificate in a convenient, easy-to-use format.
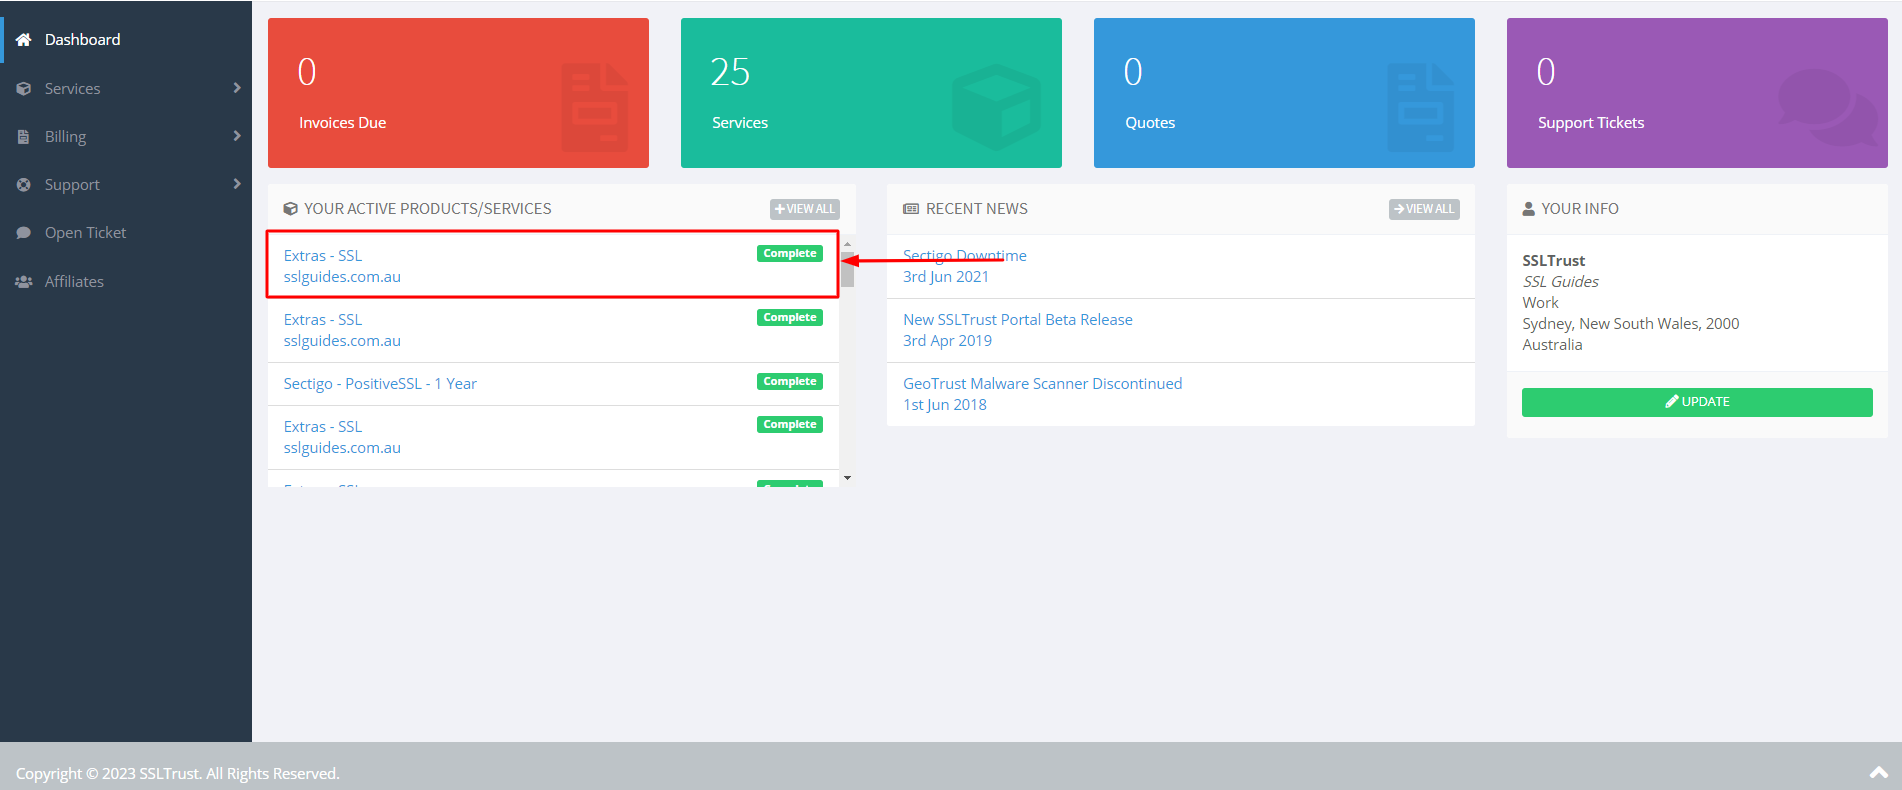
Again, head over to the SSLTrust Dashboard and click on your certificate:-
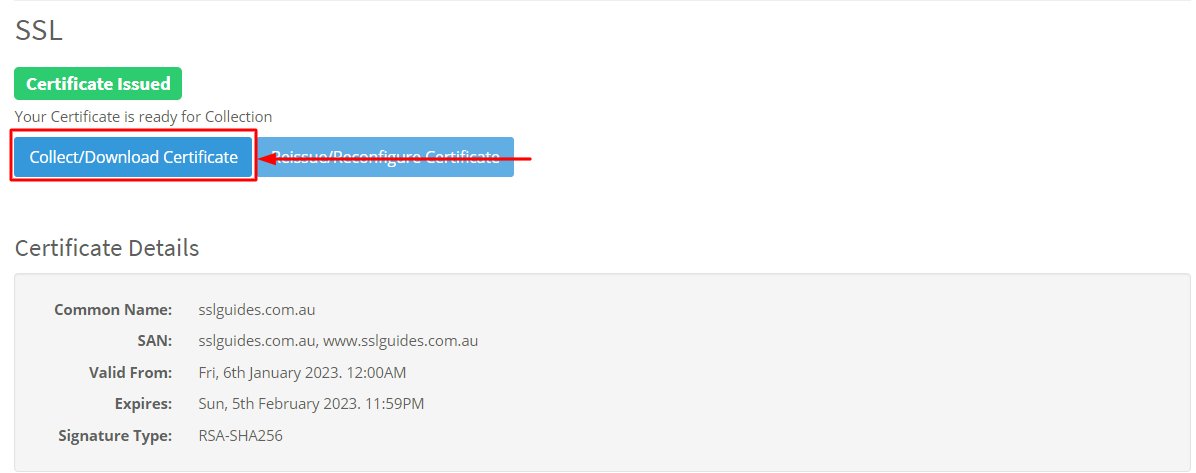
1: Click on Collect/Download Certificate-
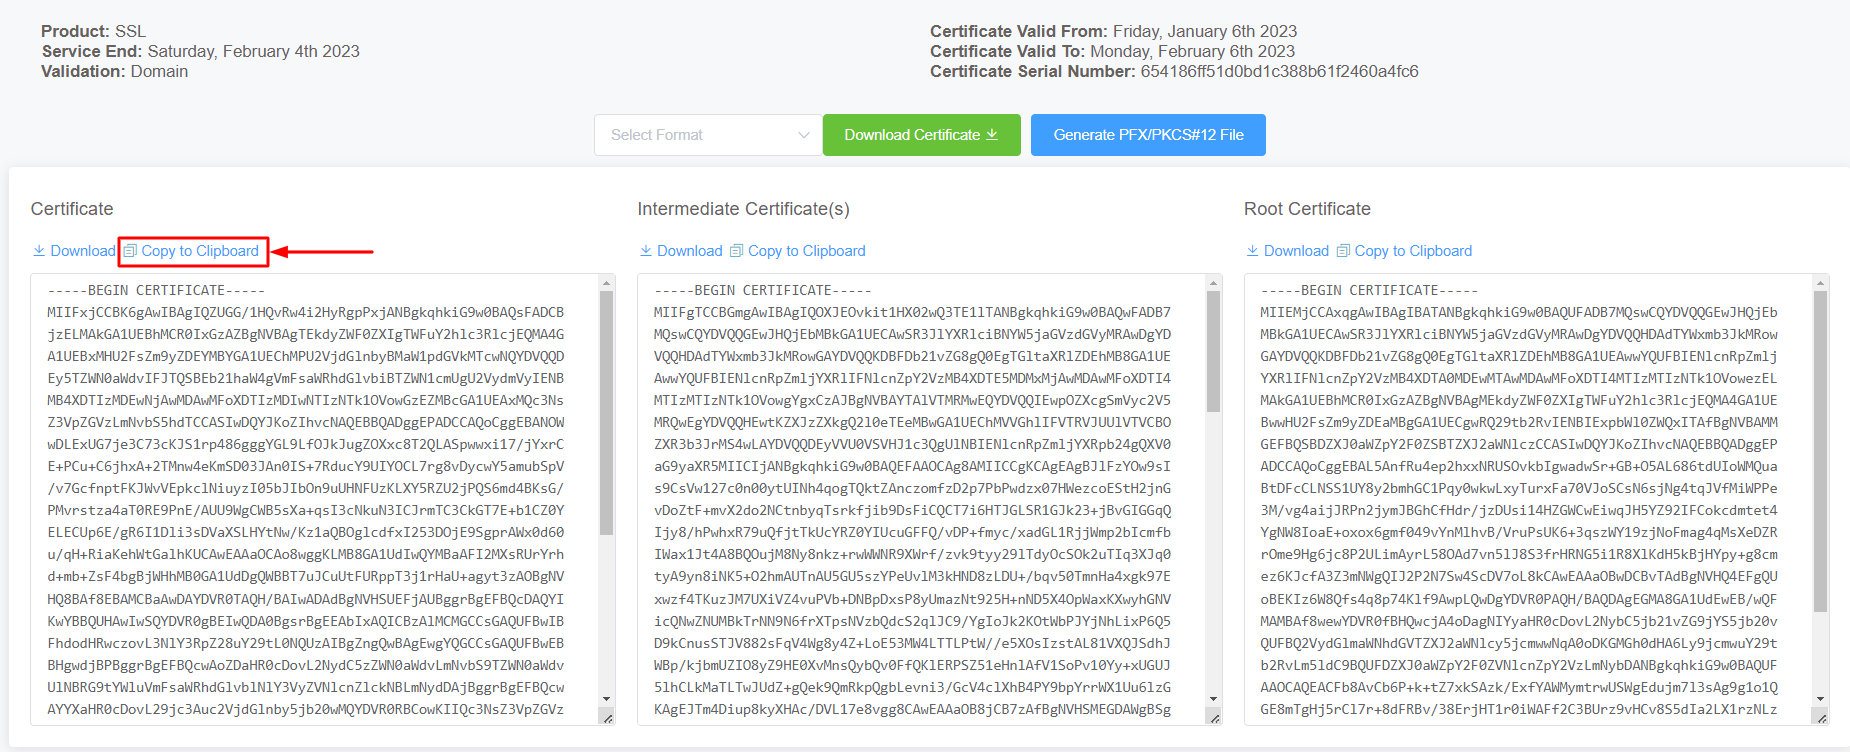
Go to the first column and click on copy to clipboard
2: Navigate to
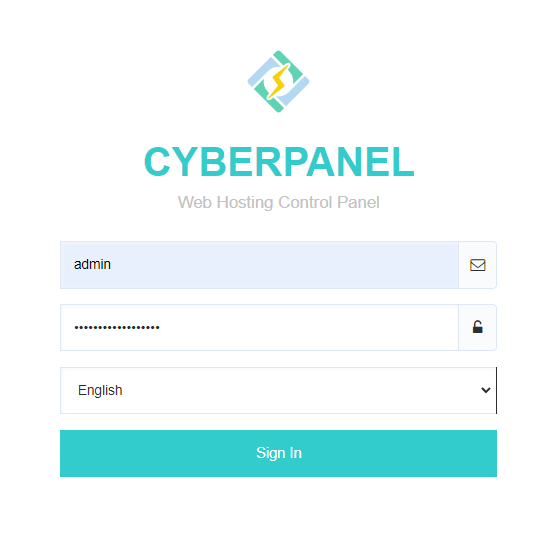
http://yourdomain.com:8090and login as admin to your Server
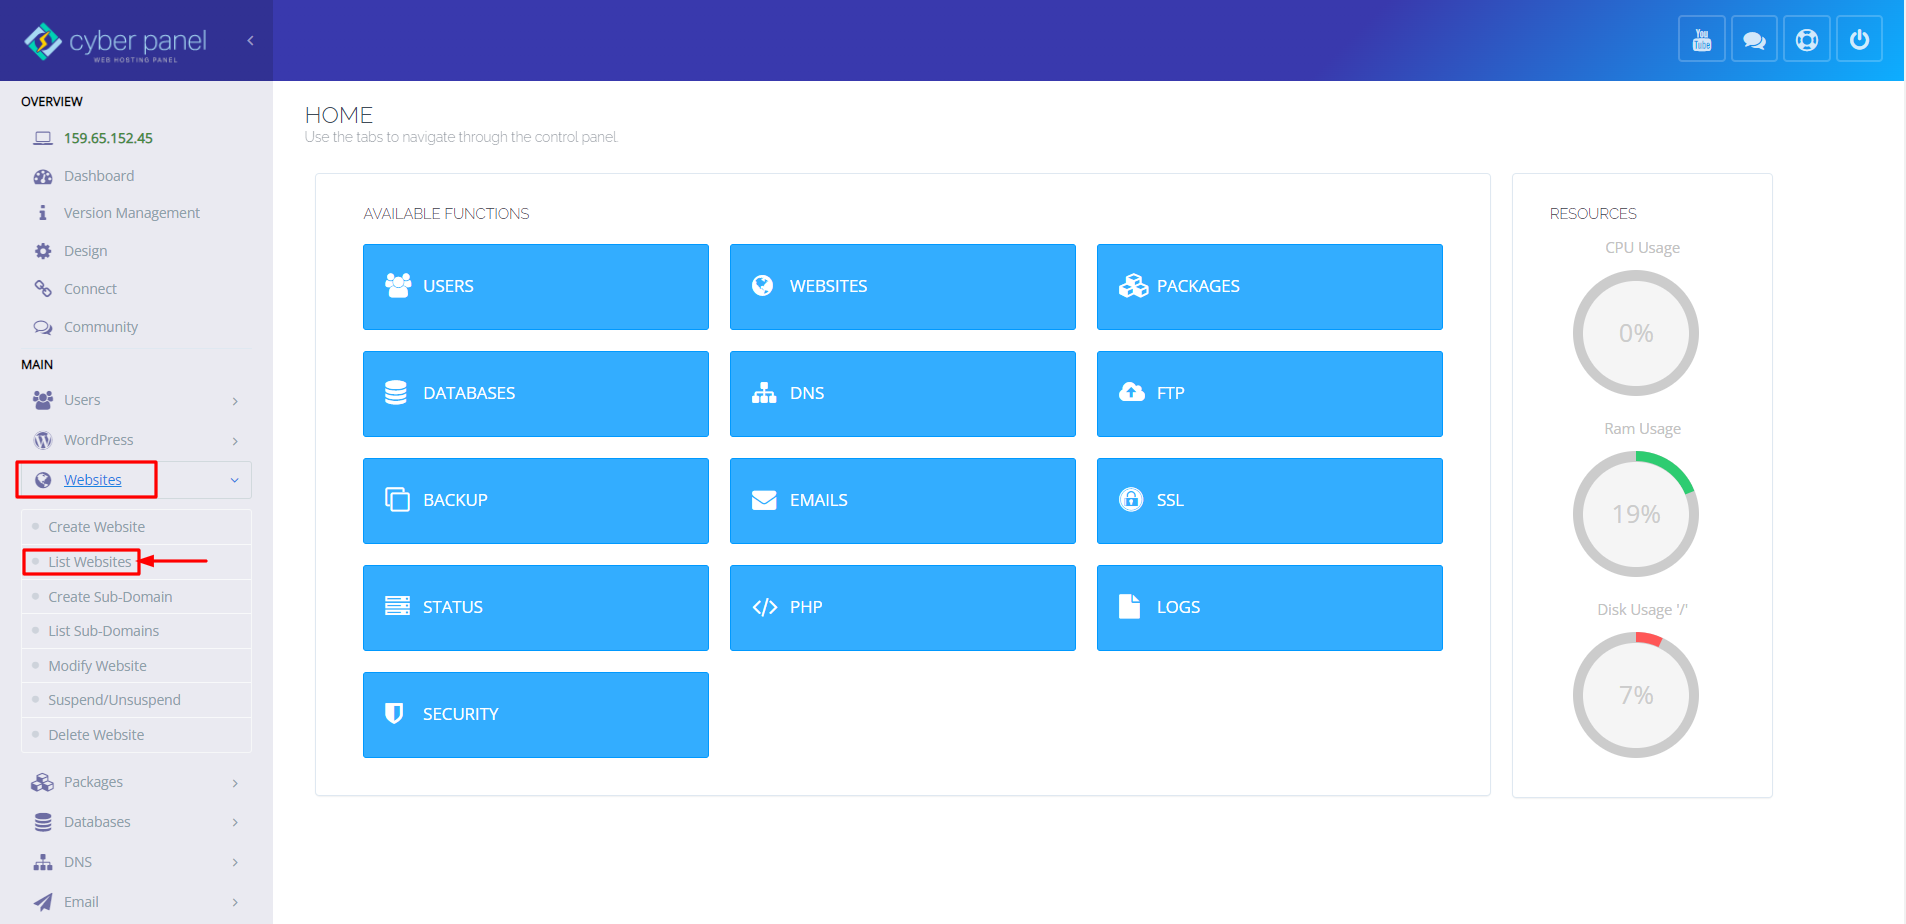
3: Click on the 'Websites' Option on the Menu then select 'List Websites'
4: Click on 'Manage' to install the SSL Certificate on the required website

5: Scroll down and find 'add SSL' under Configuration

6: Paste in the Main Certificate that you copied in the appropriate dialog box and then proceed to copy and paste your Private Key

7: Now, head back to the certificate collection page and click on copy to clipboard on the Intermediate certificate.

Proceed to paste your Intermediate Certificate in the certificate dialog box just after the main certificate to form a chain.
It should look like this:-
  -----BEGIN CERTIFICATE-----
  MAIN CERTIFICATE DATA
  -----END CERTIFICATE-----
  -----BEGIN CERTIFICATE-----
  CHAIN/INTERMEDIATE CERTIFICATE DATA HERE
  -------END CERITIFCATE-------
8: Finally, click on Save
The Server should automatically restart and changes should take effect
Now, navigate to https://yourdomain.com to view your secure website.
Step 4. Test the SSL Certificate
SSL Labs, now called Qualys SSL Labs, is a web service providing tools to analyze and test the SSL/TLS configurations of web servers. Its SSL Server Test assesses various security aspects, assigning a grade based on the server's overall security posture. This tool is widely used by administrators and security professionals to ensure secure server configurations and identify vulnerabilities.
We recommend you use this tool to check the install has been completed successfully: www.ssllabs.com/ssltest/
For custom port/Localhost SSL Testing, check out another tool here
 You may need to get your web developer, or update your website yourself, to make sure all files use https:// and all links to your site and within your website use https://
If you require any assistance with your SSL Installation please contact our friendly support team.
